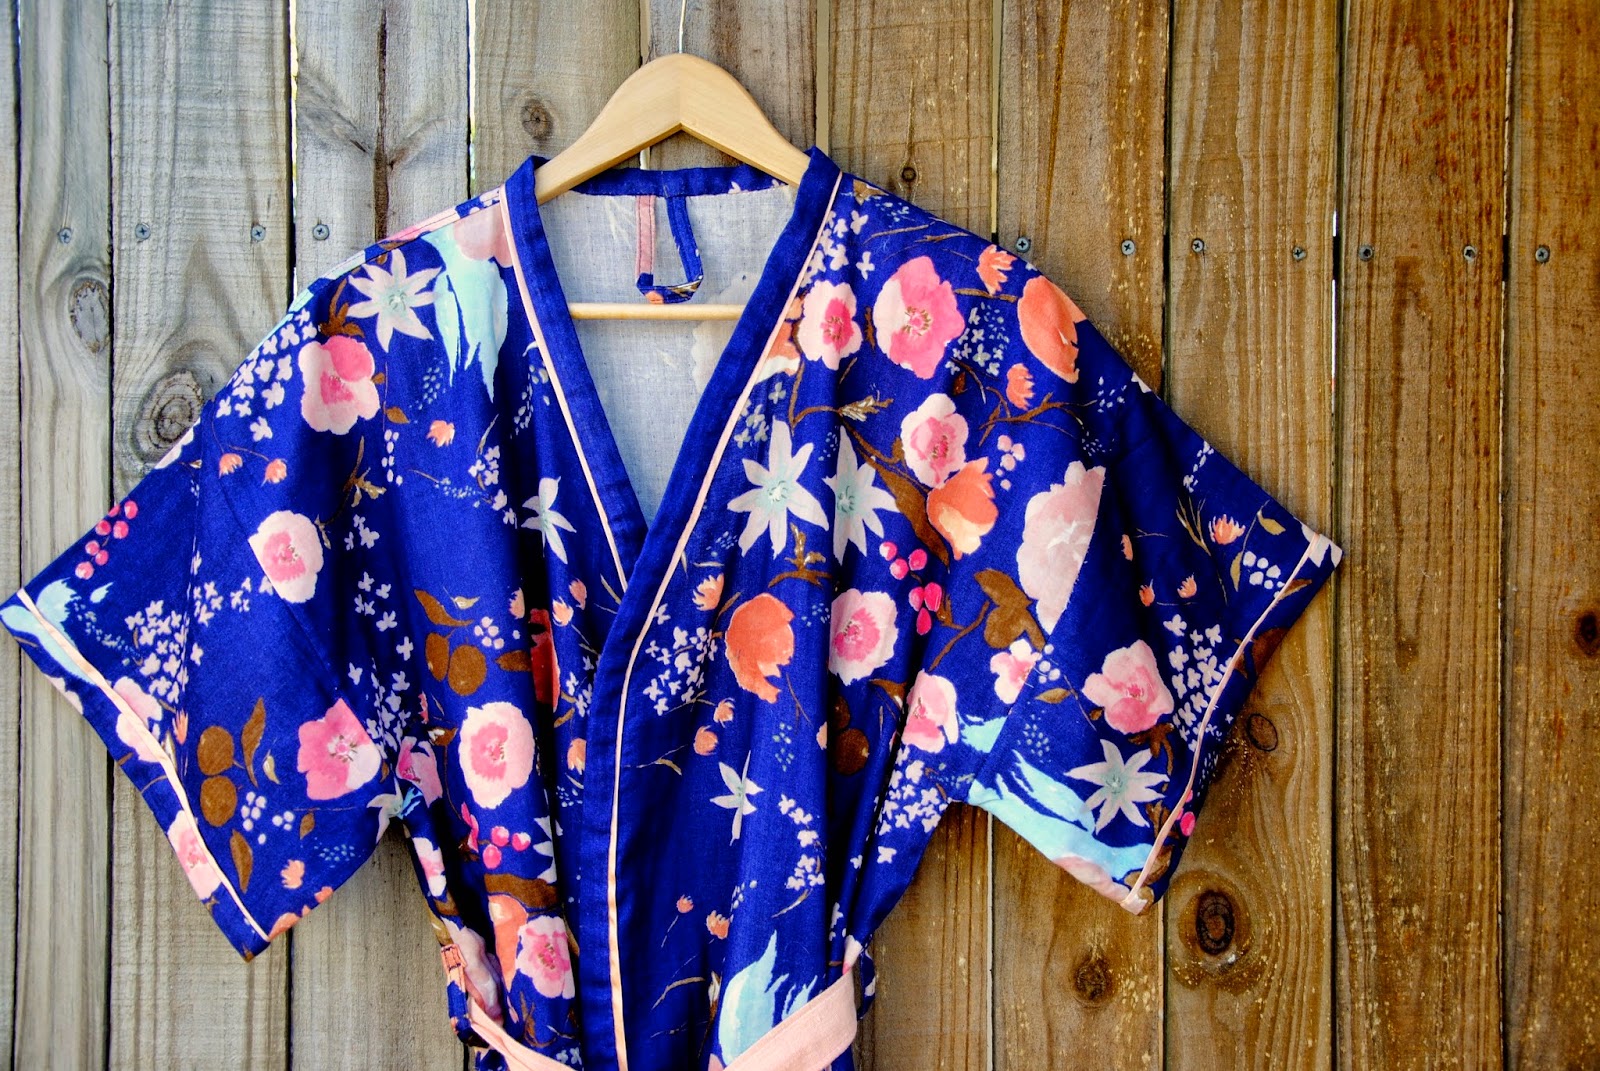
Nani Iro Kimono Robe
With my bump increasing at a rapid rate, I've been sewing lots. A few maternity makes, up-cycling thrifted clothes into easy bump-wear, and some basics for the toddler. With a December deadline (due date!) I want to make ALL the things! Especially knowing my sewing machine will probably not see the light-of-day for a little while.
One little splurge just for me was some beautiful Nani Iro fabric to make into a dressing gown. I know I will get a lot of use out of this. I've always wanted an excuse to get my hands on some of the lovely Japenese double-gauze, and needing a summer-weight dressing gown was the perfect excuse. I spent an excessive amount of time trawling Etsy and the internet to find just-the-right pattern & colour way. I needed something that would hide all manner of sins (baby-vomit and other baby-related-unmentionables). It was super hard to choose, but in the end I decided on this gorgeous (2013 season) Fuccra Rakuen Aegean floral with a navy/deep purple base. I'm not usually a floral-print person, but for lounge wear it's perfect. The only slightly down-side is the wrong side of the fabric is a lighter cream/white colour (not navy to match the print) so it is quite noticeable when the gown is open. It's a tiny little detail, but not having used Nani Iro fabrics before I was perhaps (naively) expecting it to match.
- I used 2 yards to cut out my basic kimono.
- I used a self drafted a pattern, comparing my construction method with 2 easy patterns - Purl Bee's Women's Robe (sign up for their newsletter & you can get this pattern free!), and also from the book "Print's Charming".
- Having made one kimono gown before, I did slim-down the fit a bit for personal preference. The sleeves are above-elbow length and the hem sits just above my knees.
- I also added in-seam pockets which does make the sides appear a bit fuller than I'd like, but the functionality wins in my book. I just didn’t want patch pockets (and couldn’t have fit them in the fabric anyway).
- I used french seams for the shoulders and sleeves, then just overlocked the side seams. It was just easier to do this, construction wise. It’s not as pretty but the overlocking stitches are quite hidden in the lighter underside.
- I used just about every scrap to make this - I even had to patch the pockets with a contrasting colour. At least the contrast isn’t visible from the outside opening.
- I used satin bias strips to add a contrast to the neck facing and sleeves. I love how it breaks up the print a little bit and picks up on the lovely peach tones (one of my favourite colours. Along with Navy. basically this fabric has all my favourite colours in it).
- The double gauze is just heavenly. I can see this as a perfect summer AND winter fabric - it is cool to wear, but quite cosy at the same time. Everything everyone ever said about Nani Iro is true - it’s amazing stuff!
- I used the same satin bias for the hem for a lux look and also to retain as much length as possible (as it was a long as I could cut it!). The back hem is slightly dipped - i liked the look as well as having a bit of extra length at the back.
- Both the hem and the neck facing are hand-stitched down on the underside.
- Because of yardage I couldn’t cut a matching waist-tie, but I do like the contrast one better anyway. I used a thrifted linen which is a perfect match for the fabric and the bias. The texture of the linen holds the bow so nicely.
I really took my time with this. So many times I had to force myself to slow-down my sewing and construction to get everything right the first time. I love the almost-instant satisfaction of sewing and just want to wear everything I'm sewing NOW. I spread out this make over about 4 weeks, a little bit here and there and the result is exactly as dreamy and perfect as I had imagined. So bring on this little one and lazy days lounging on the couch soaking up all that newborn goodness!
(last pic - with our stunning Kangaroo Paw - a native Australian plant).
(last pic - with our stunning Kangaroo Paw - a native Australian plant).


